
This weekend I want to experiment with machine learning on Azure. I don’t have my own Jupyter notebook server so I want to use the Azure Notebooks, which are Free Jupyter based notebooks in the Azure cloud.
The first thing I noticed is that there are two types of workspaces: ML and ML Studio. What is the difference between the two?
Azure Machine Learning service is a managed cloud service for ML to train, deploy, and manage models in Azure using Python and CLI.
Azure Machine Learning Studio is a drag-and-drop visual interface for ML to build, experiment, and deploy models using pre-configured algorithms.
Use Machine Learning Studio when you want to develop and deploy models with no code required.
Compare ML products at Microsoft
I went through the online tutorials for both of these services to evaluate which one is more suitable for me.
Pi estimate with the Azure Machine Learning service
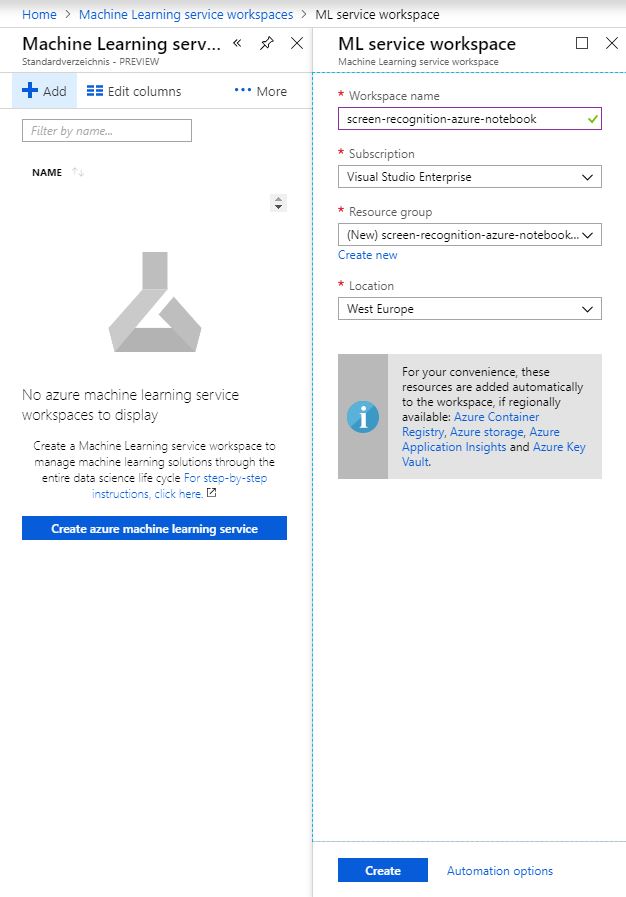
- Go to Machine Learning service workspaces, create a new workspace and open it.
- Select Explore your Machine Learning service workspace under Getting Started.
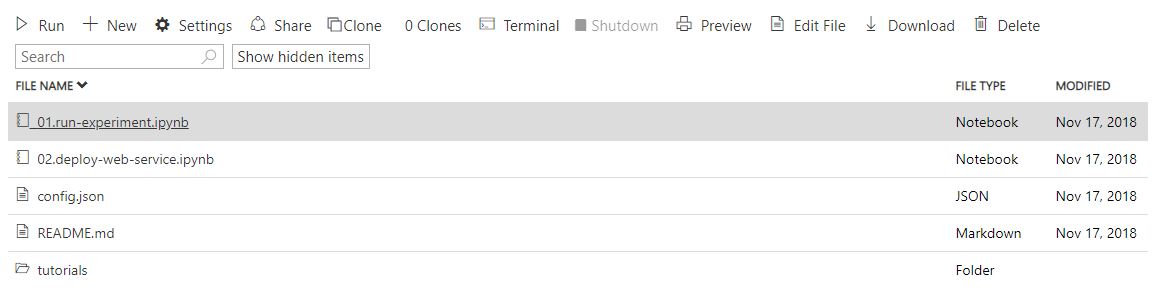
- Click on Open Azure Notebooks. This opens a new tab where you can clone a sample notebook.
- Try the example 01.run-experiment to connect to your workspace and run a basic experiment using Azure Machine Learning Python SDK. This opens a new tab with the Jupyter notebook where you can click through the steps by pressing Run step by step.
- Once the run has completed, you can view a detailed report of the run from Azure Portal by clicking on the link to the experiment in the Azure Portal. This opens the experiment where you can see the details like the number of iterations, estimate chart, errors chart and the final estimate.
- Make sure to clean up the resources by deleting the resource group, if you no longer need them. Alternatively you can re-use the resources with other notebooks.
You can find a more detailed step by step guide here or watch the video here.


Automobile price prediction with the Azure Machine Learning Studio
- Go to Machine Learning Studio workspaces, create a new workspace and open it.
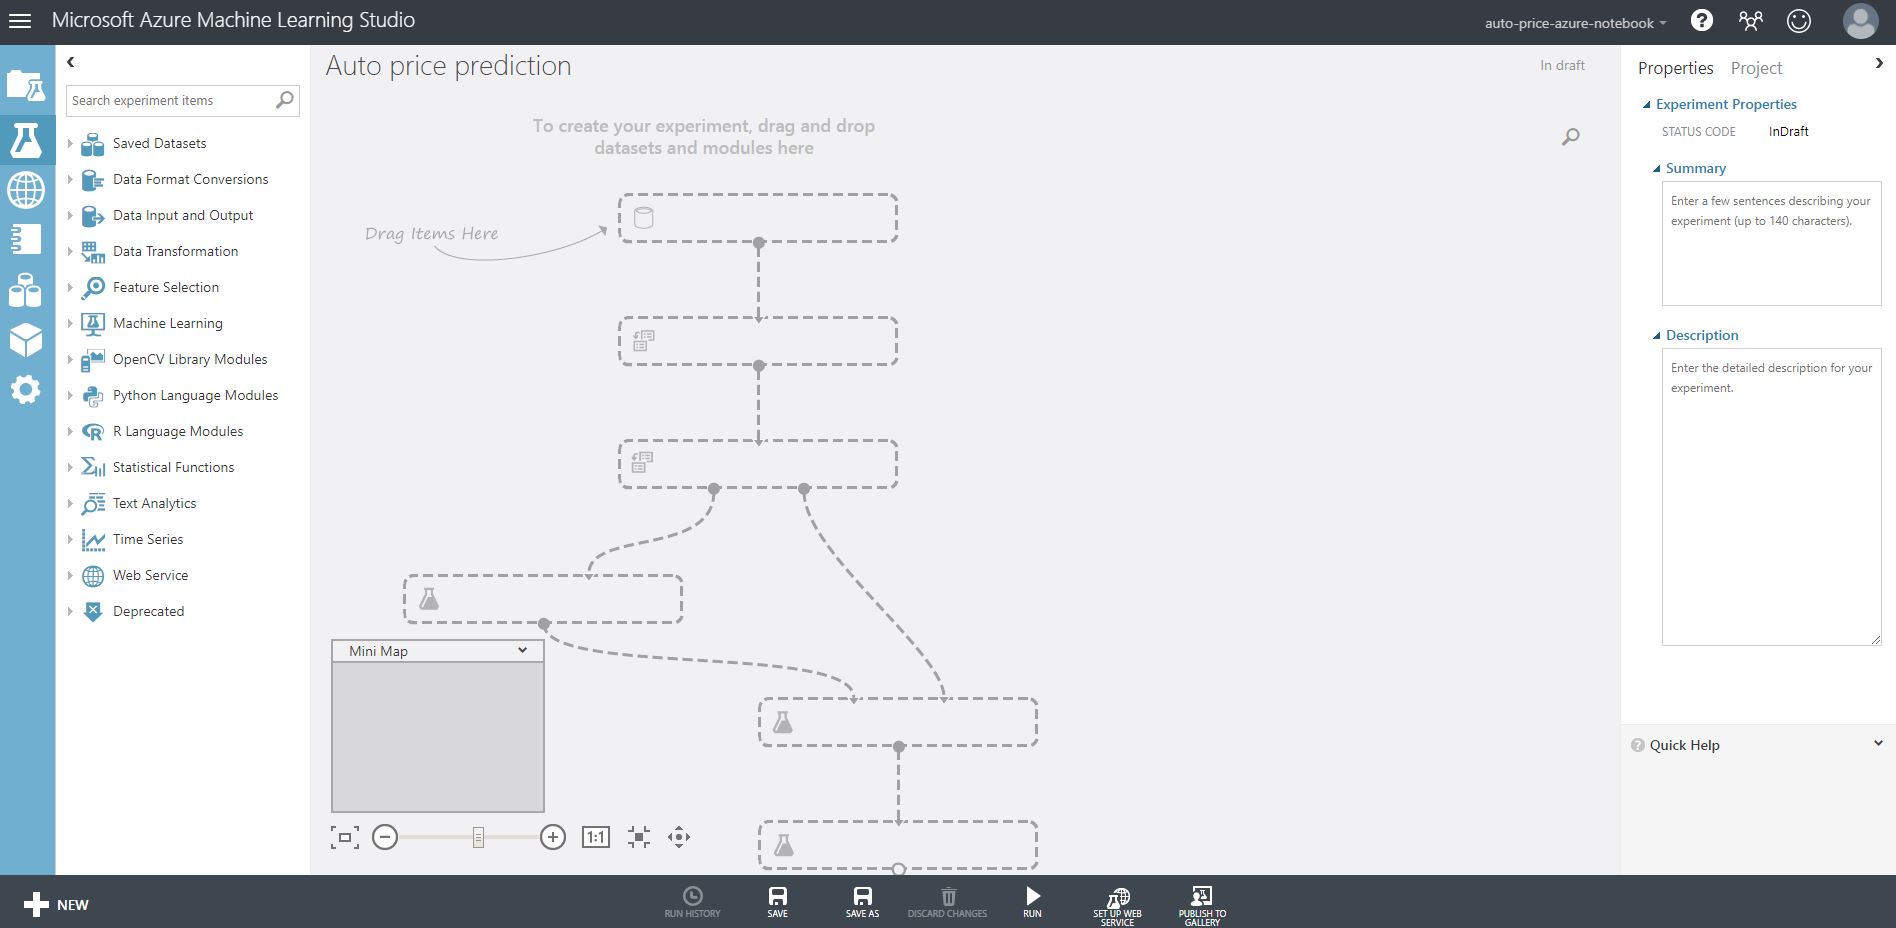
- Select Launch Machine Learning Studio and create a new experiment from a blank experiment.
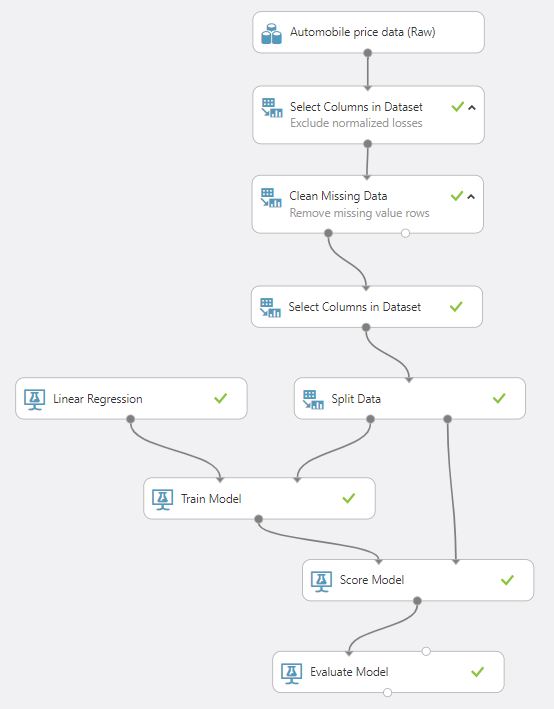
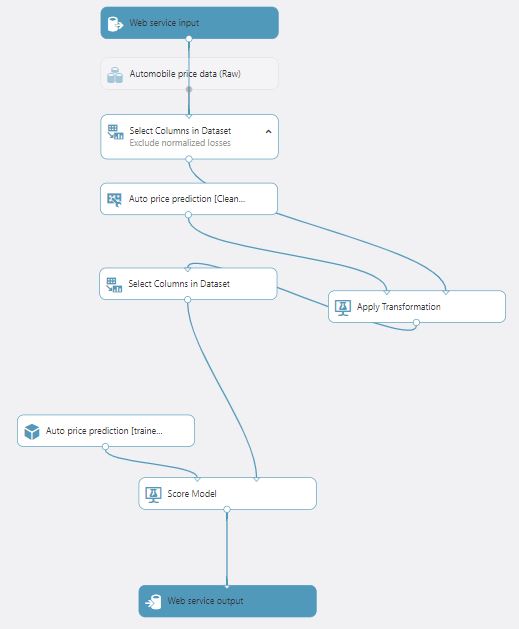
- Add the dataset module Automobile price data (Raw),.
- To exclude a column, add the data manipulation module Select Columns in Dataset and connect its input to the dataset module’s output. In the Properties, select Launch column selector, select With rules, select Begins With All Columns and select Exclude => columns names => normalised-losses.
- To remove missing value rows, add Clean Missing Data
and connect its input to the Select columns module’s output. In the Properties, select Remove entire row as Cleaning mode. - To create a filtered dataset with a subset of features for the learning algorithm, add the data manipulation module Select Columns in Dataset and connect its input to the Clean missing data module’s output. In the Properties, select Launch column selector, select With rules, select Begins With No Columns and select Include => columns names => make, body-style, wheel-base, engine-size, horsepower, peak-rpm, highway-mpg, price.
- To split data data and use 75% for trainig the model, add Split data module and connect its input to the Select Column module’s output. In the Properties, set Fraction of rows in the first output dataset to 0.75.
- To select the learning algorithm, add Linear Regression module. To train the model, add Train Model module. Connect Linear Regression module and the Split data module’s output to the Train model module. In Properties of Train model module, select Launch column selector and select price.
- To score the model with the other 25% data, add Score Model module and connect it to the modules Train model and Split data.
- To test the quality of the results, add Evaluate model module and connect its input the the Score model module’s output.
- Run the experiment and visualize the output from the Evaluate model module.
- To convert the training experiment to predictive experiment, select Set up as web service, then select Predictive Web service. This adds the new modules Web service input and Web service output.
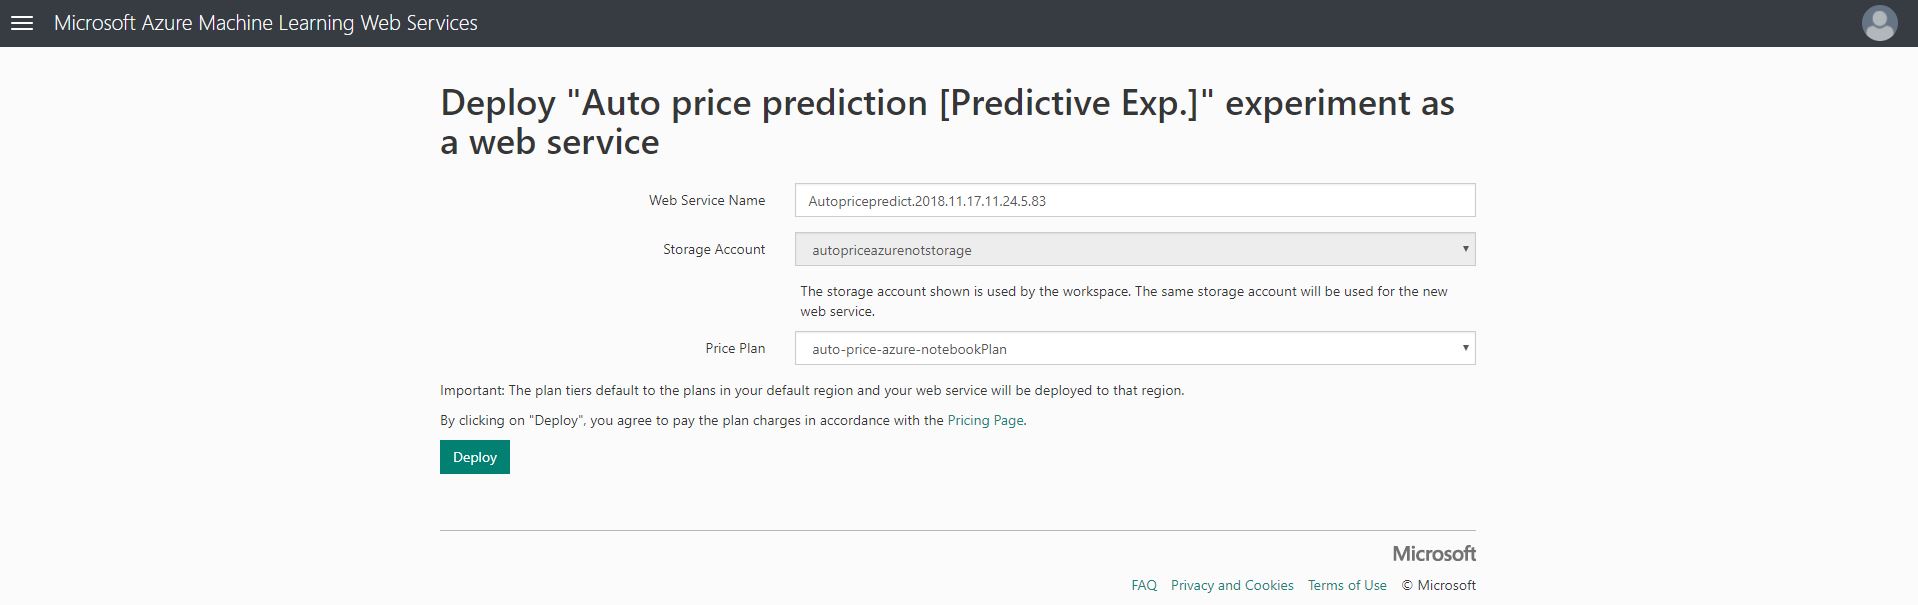
- To deploy the predictive experiment as a new Azure web service, click Run, afterward select Deploy web service and choose either Classic or New. This opens a new window where you can select the price plan and click Deploy. After deploy finished, you can test and consume the web service from the quickstart page.
- Make sure to clean up the resources by deleting the resource group, if you no longer need them. Alternatively you can re-use the resources with other notebooks.
You can find a more detailed step by step guide to create the experiment to deploy the web service.


Machine Learning Studio is extremely easy to get started with machine learning by simple dragging and dropping the experiment items to the canvas and I will definitely use the Studio in some cases. On the other hand, I like to get my hands dirty with code so the Machine Learning Service is probably more suitable for me in most of the cases. Nevertheless both services are great offerings from Azure so that everyone with different levels of knowledge and skills can use machine learning.
You can try Azure Machine Learning for free. No credit card or Azure subscription is required. Get started now. https://azure.microsoft.com/free/

You must be logged in to post a comment.