This is part #2 of my adventures in Building the Internet of Things with the Raspberry Pi with @sn0wcat. You can read about Getting started with Raspberry Pi 3 which is a prerequisite for this post.
I initially ordered the Raspberry Pi 3 Starter Kit Bundle, set it up with Windows IoT Core and tested some of the samples available online but now it’s time to get serious. I always start with a “Hello World” project and the “Hello World” in the the IoT world is a Blinky Project. So my plan is first to make a led blink with C# and then extend the project with a website built in HTML5, CCS3, JavaScript, TypeScript, Angular.js and Node.js where a text is entered that is sent to the Pi and the Pi blinks this text in Morse Code.
For this purpose, I need a few more things to extend my Raspberry Pi so I ordered the Sunfounder Project Super Starter Kit for Raspberry Pi, which should include all the parts that I need for my little project. This kit is actually for Raspberry Pi 2 & Model B+ but it is compatible with the Raspberry Pi 3 as well because the GPIOs are identical for the Pi 2 and 3, so the hardware components are compatible. Also the control of the GPIOs remained the same.
I also ordered the PiHub USB hub with own power supply for Raspberry PI. The hub has 4 USB slots. I have USB hubs at home but I love the stylish Raspberry Pi Logo Design so I just had to have it. 🙂
The Sunfounder Project Super Starter Kit includes 15 Projects for beginners and we start from the beginning with Lesson 1: Blinking LED. We use also the Blinky Sample as a starting point.
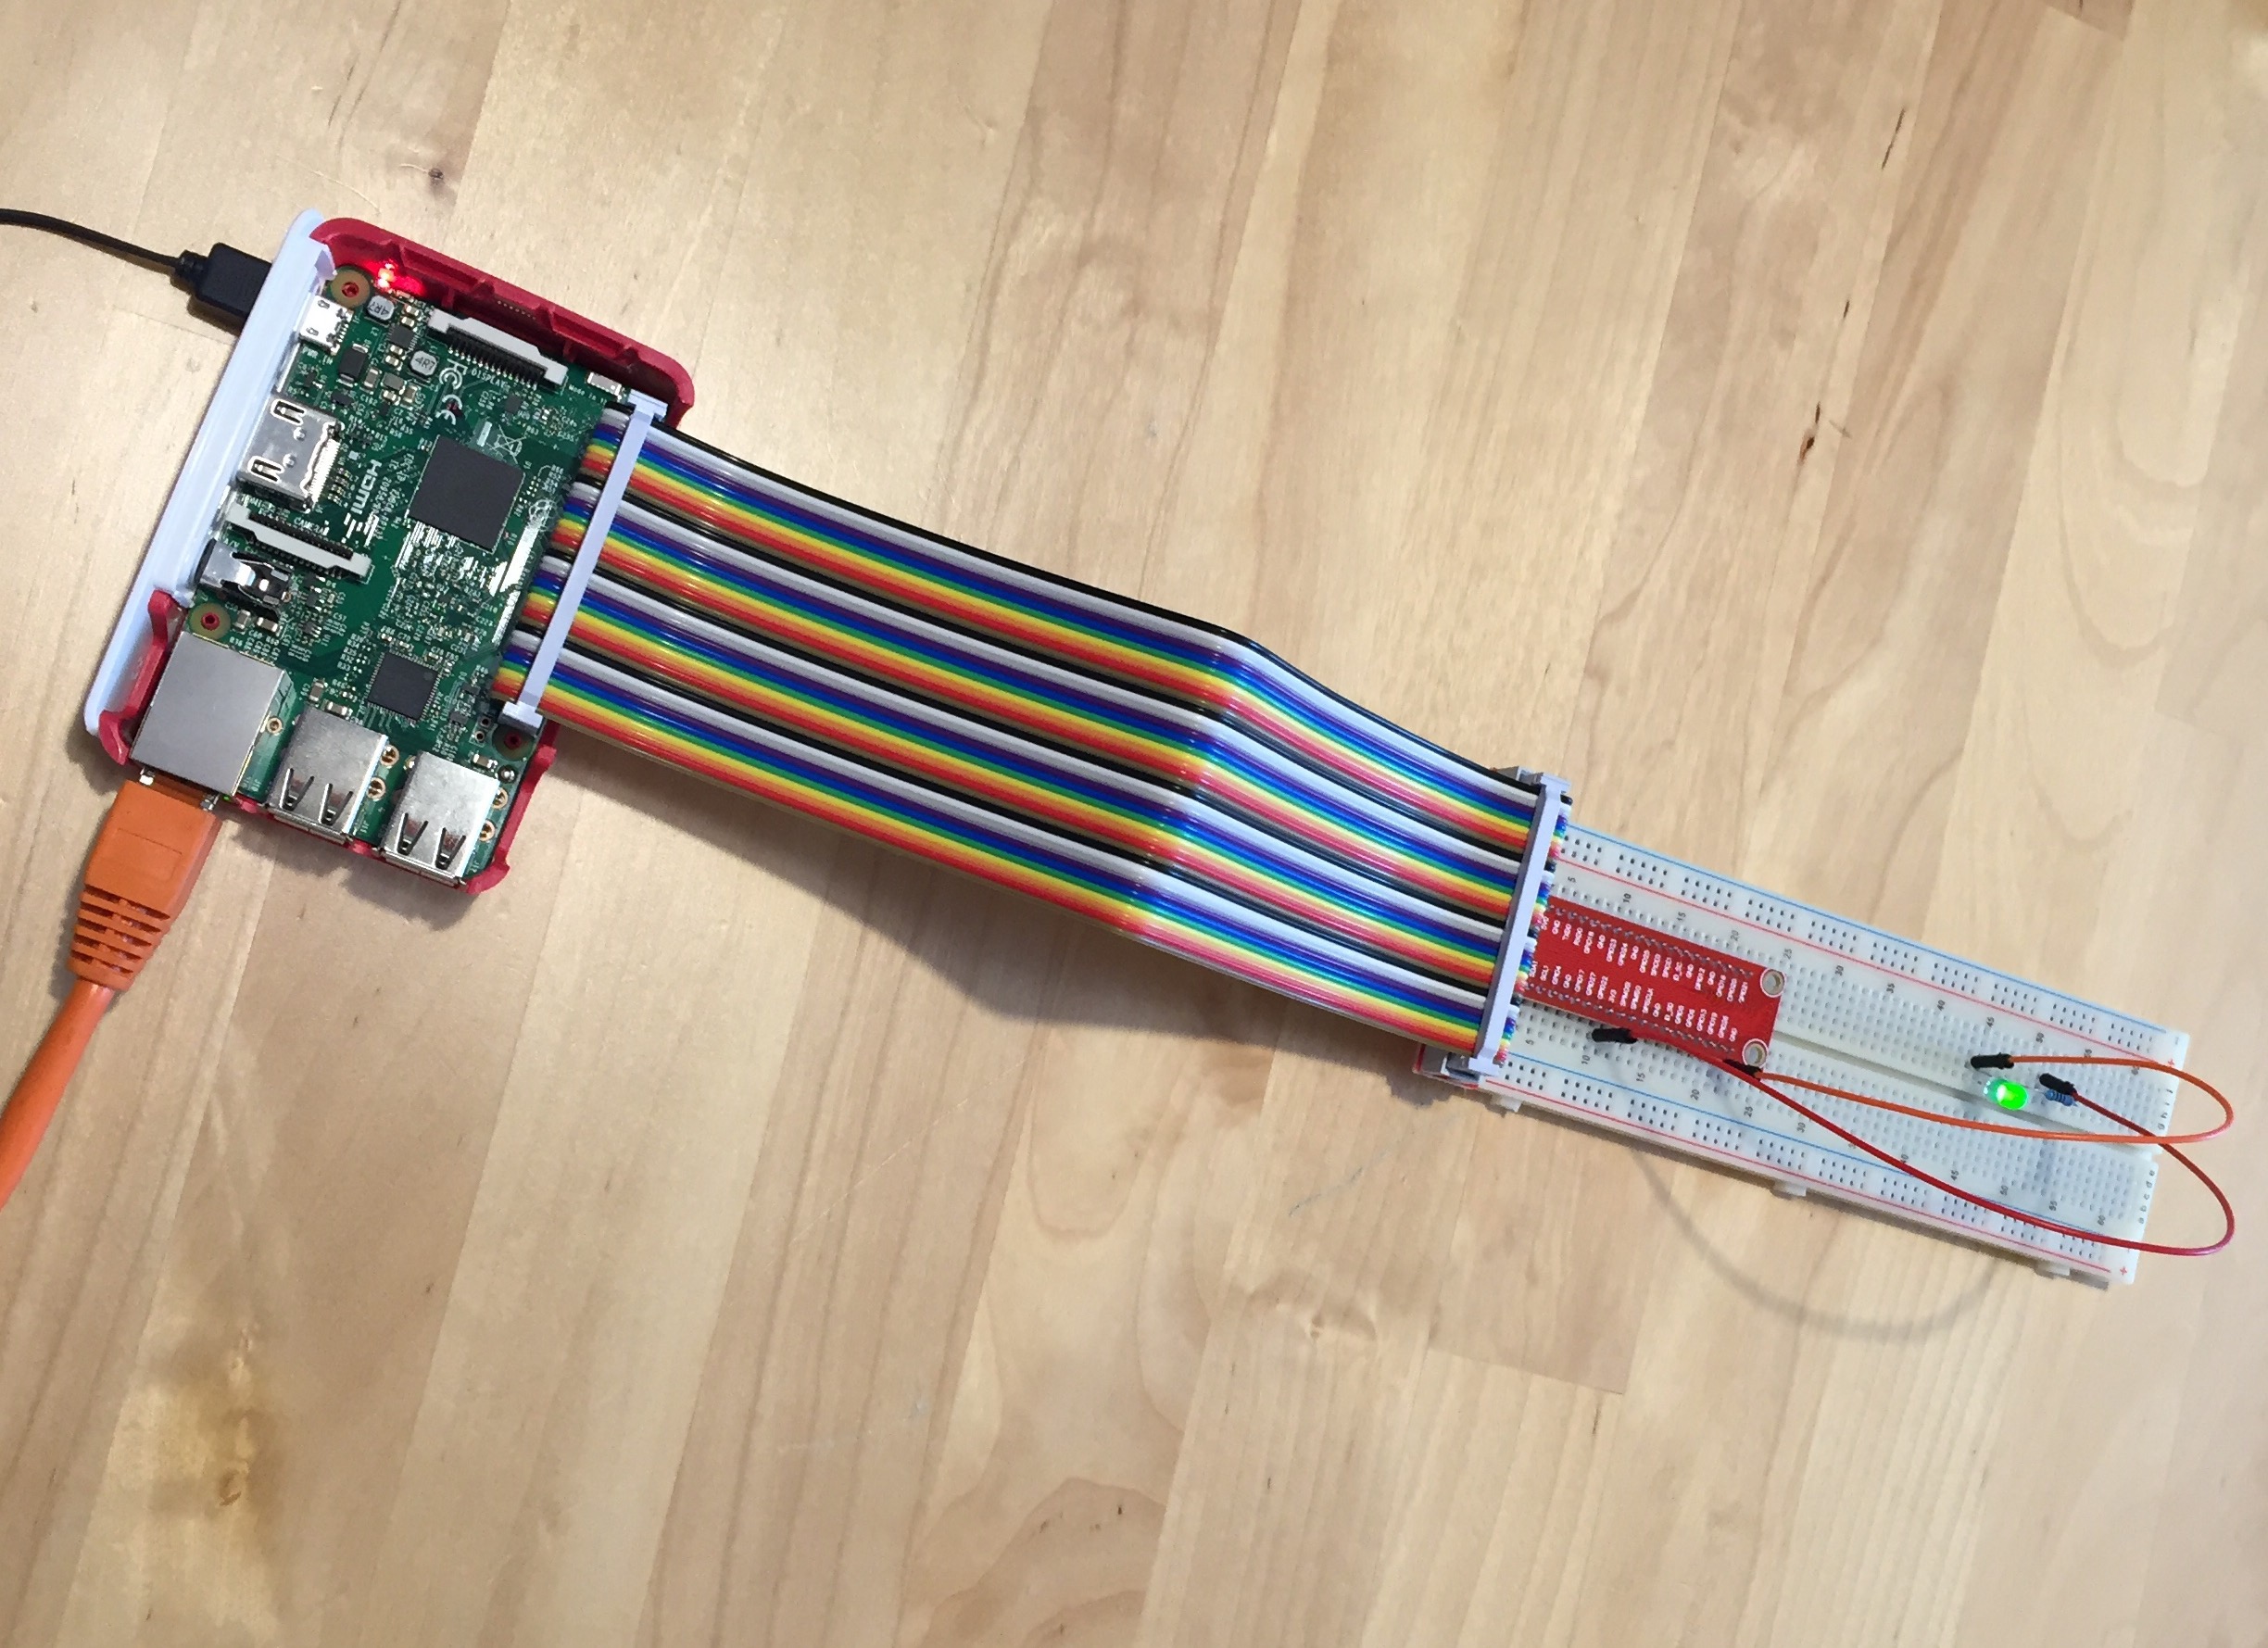
Connecting the LED to the Raspberry Pi 3
Components:
- 1 Raspberry Pi 3 with Windows IoT Core
- 1 breadboard
- 1 LED
- 1 resistor
- GPIO extension board
- GPIO cable
- 2 jumper wires
We use the 40-pin GPIO extension board and GPIO cable to connect the breadboard to the Raspberry Pi 3. We connect the LED to the device as described in the Blinky Sample. At this point we simply connect the wire from the pin to the ground to check if it all works.
Add code
Next up we want to make the LED blink programmatically.
I am using the Visual Studio 2015 Community Edition which is available free of charge, I have an MSDN license but I want to see how much I can accomplish by using only free dev tools. Alternatively Visual Studio Code is available on all platforms.
Using C#
Blink LED
We download the Blinky Sample code. When opening the project in Visual Studio, it prompts me to install the Universal Windows App Development Tools and enable Developer Mode for Windows 10 to work with the Blinky sample project in Visual Studio. We deploy the app as described in the sample page.
At this point we refactor the Blinky sample code so we can extend it easier for the next steps: we extract the initialization and blink logic for the LED from the main page to a separate class and use this class from the main page to control a LED. (See SingleLight.cs in the repo.)
Blink 2 LEDs alternating
Next up we add a second LED on pin 19 with a second resistor and we want that the two LEDs blink alternating. We introduce an interface for the lights classes, create a new class to handle two LEDs where we initialize the two LEDs and change the pin value alternating. We use this new class via the new interface in the main page. (See TwoLights.cs in the repo.)
Blink LED in Morse code
Next up we are going to make the LED blink a hard-coded string in Morse code.
We create a morse code converter class with a string extension method, that converts the input string into a Morse string. We use the dictionary of mappings between the alphabet to Morse from here. In the convert method we use LINQ to go through the input string, filter the string so it contains only the characters known in the dictionary, select the morse code from the dictionary based on each key and return this sequence of Morse code as a string to the method caller. (See MorseConverter.cs in the repo.)
Our new class implementing the same interface ILights as before initializes the GPIO just like we did before. Our blink method converts a string into Morse code, goes through the Morse code by each character and calls the method to blink dot or dash respectively. The dot and dash blink methods turn the LED on, set a delay of given seconds and the LED is turned off. (See MorseLights.cs in the repo.)
Blink LED in Morse code with message
Finally we are going to make the LED blink a given message in Morse code. This will be the last part of our Blink project: we want to build a website in HTML5, CCS3, JavaScript, TypeScript, Angular.js and Node.js where a text is entered, sent to Azure, queued, sent to the Pi and the Pi blinks this text in Morse Code. We will use Analytics to filter out curse words. We are still not sure how the user who entered the text will get feedback.
This part is coming soon in the next post.
Host the project in the cloud
Creating a repository
I chose to store my project in the cloud on the Visual Studio Team Services. You can start account trial and try out all the features for 90 days.
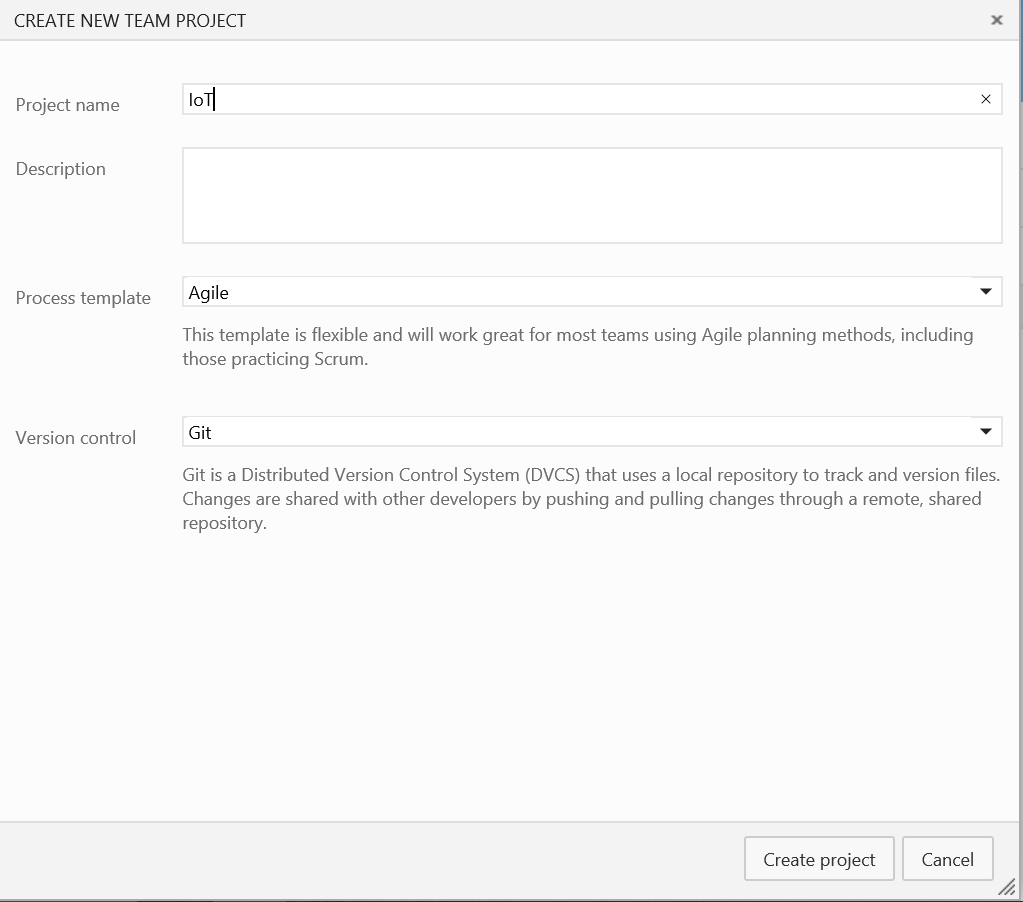
I create a team project and select Git. We’re a team of two so I add the second user to the team project. Next I open the team project in my Visual Studio and clone the repository.
We add .gitignore in our project. Here is a collection of useful .gitignore templates maintained by the community. We get the VisualStudio.gitignore for this proejct.
We push the changes to the team project in the cloud. Like this we can both work on the project at the same time and we push and sync our repo. The advantage of using Team Foundation services is the unlimited free private repos and I want to keep this team project private during development.
Finally, I uploaded the project on GitHub as well.
Final words
Thank you for this awesome hacking weekend to my partner in crime, @sn0wcat. 🙂 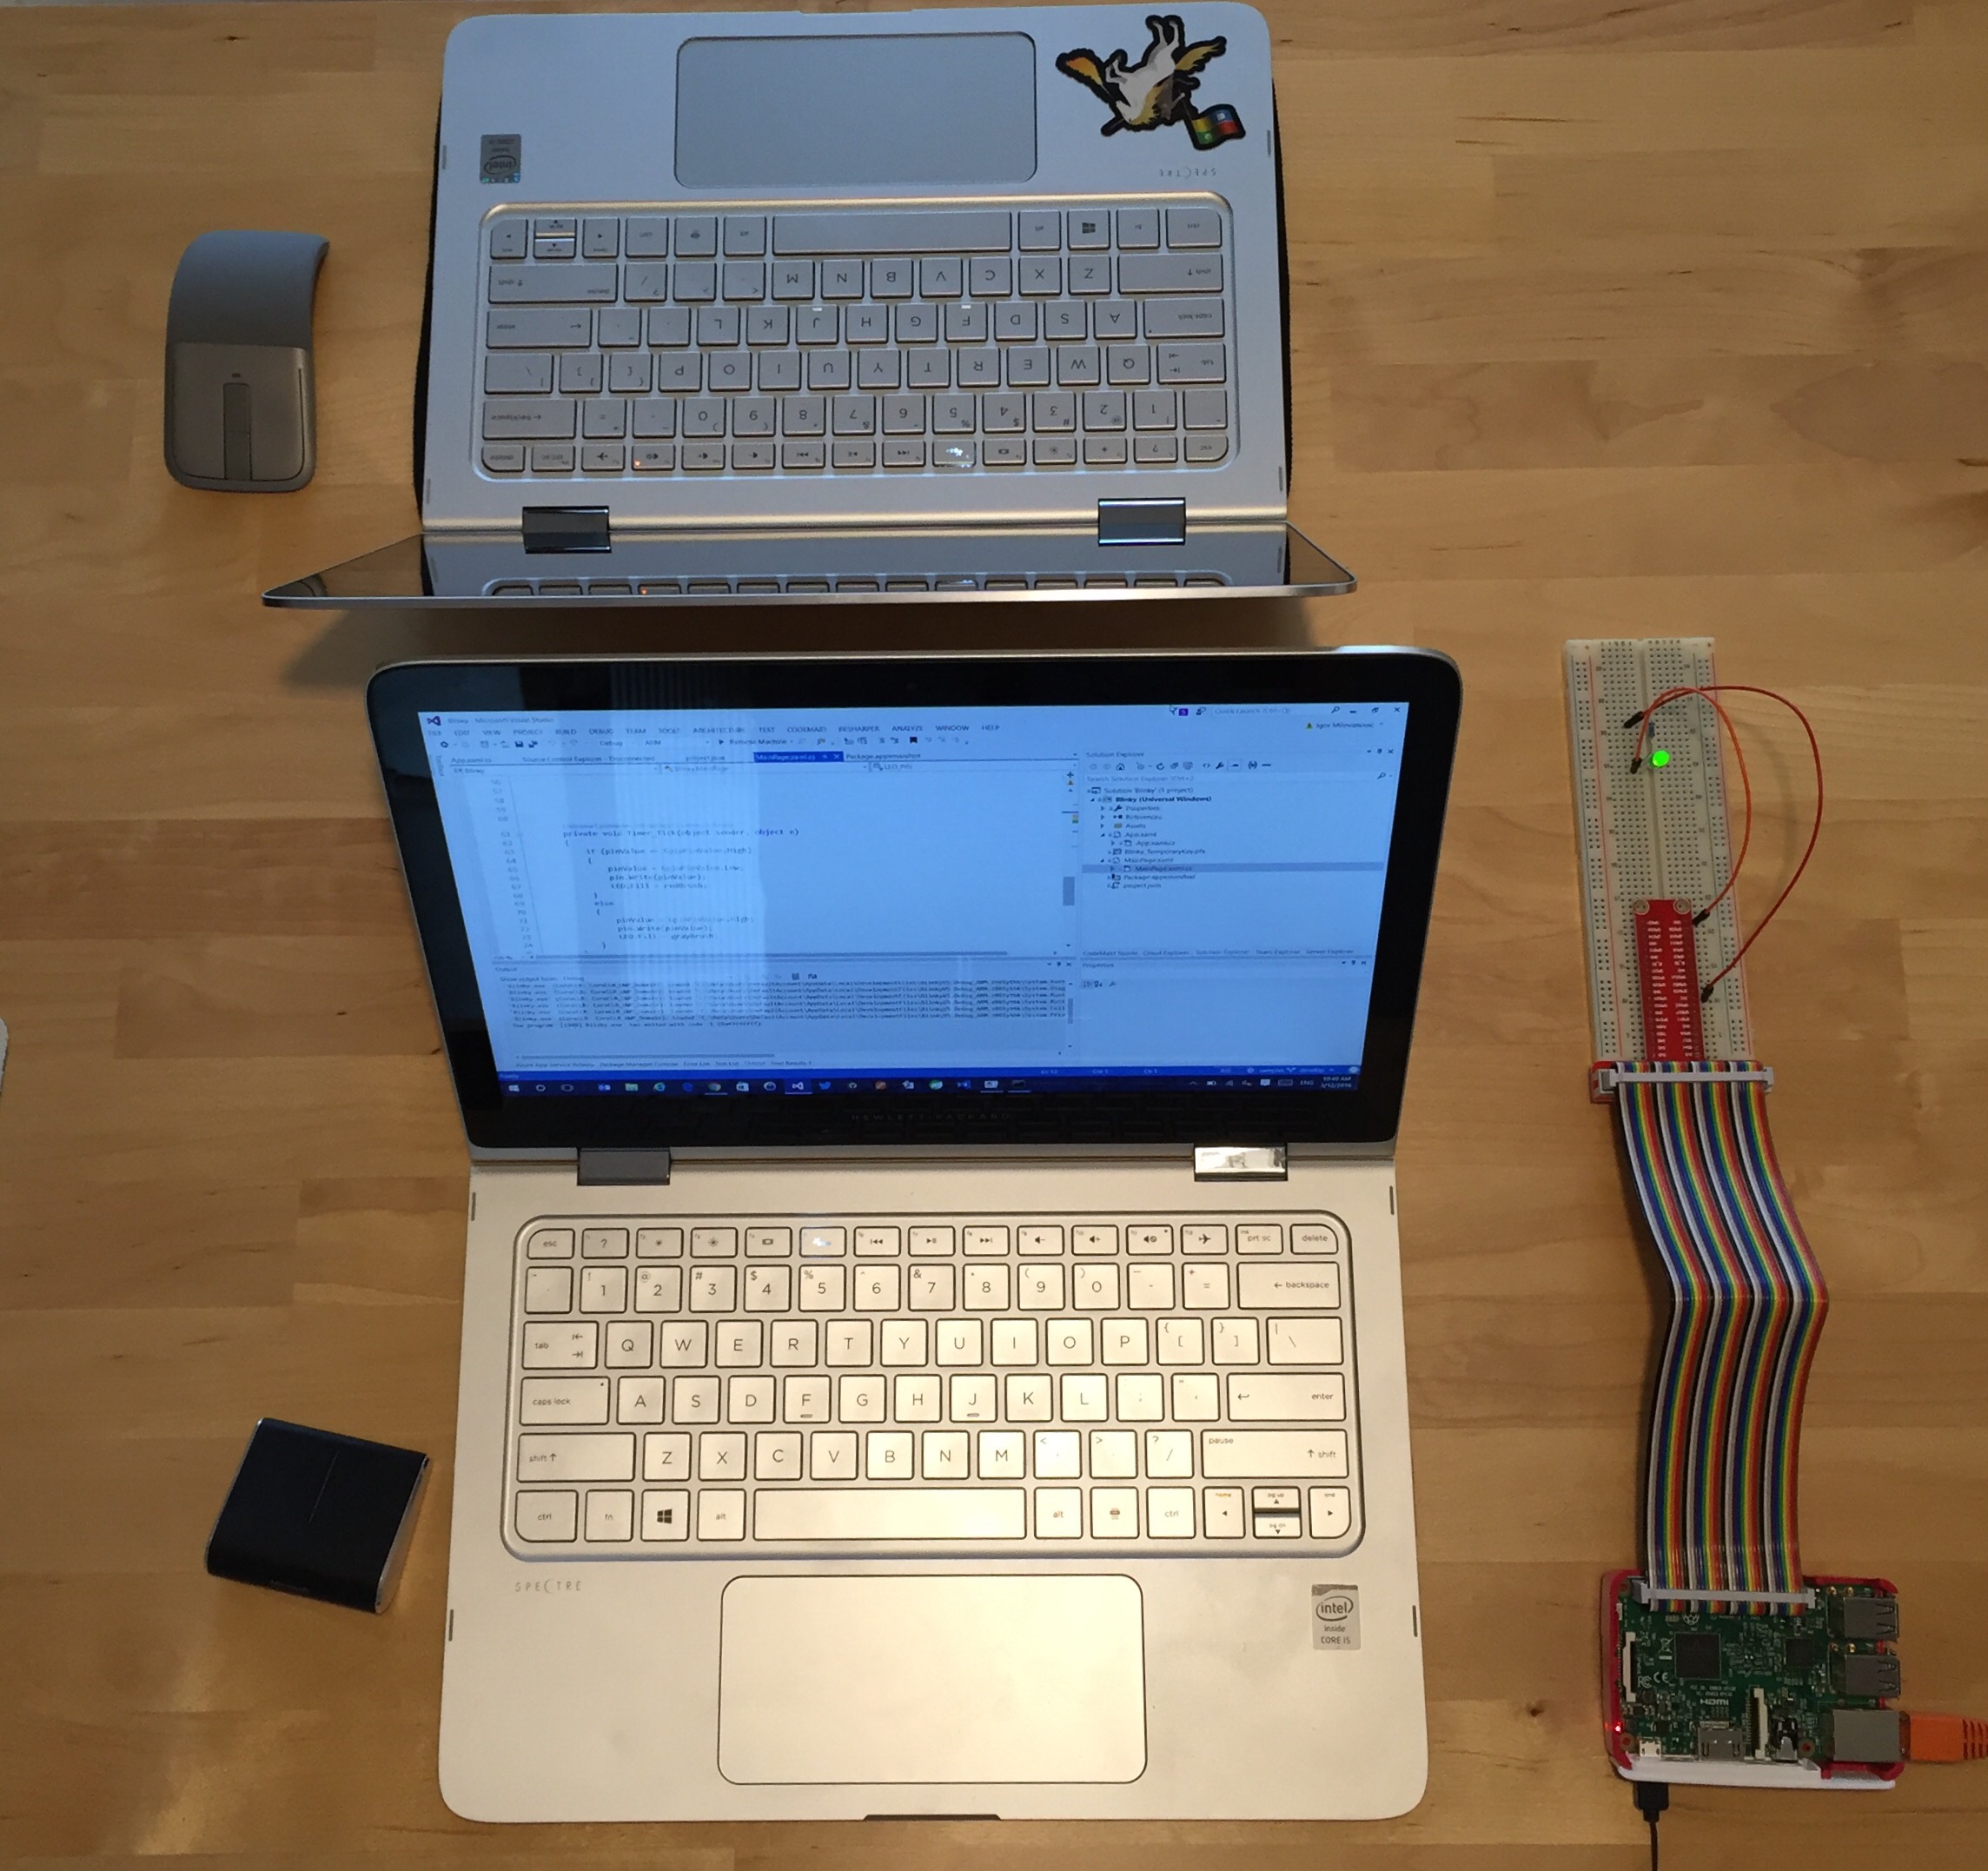

You must be logged in to post a comment.